HOLOGRAM::VFX_LOGICSTATUS::MODIFIED
Project Overview
This project aims to recreate the “Body Scan” effect commonly found in sci-fi interfaces. The goal was to implement a character shader that smoothly transitions into a semi-transparent, glowing holographic state, accompanied by a vertically moving scanning line. The primary technical challenges involved eliminating the “sliding” texture artifacts during character movement and resolving the visual clutter (Self-Overdraw) inherent in transparent rendering to ensure a clean aesthetic.
1. Concept: Edge & Flow
Visual Hierarchy:
- Rim Light: Outlines the silhouette, giving the hologram volume and preventing it from looking flat.
The independently rendered Rim Light layer.
- Scanning Beam: A vertically scrolling light band simulating the operation of a scanner.
A vertical scanning texture driven by time flow.
2. Technical Breakdown
A. Deriving Fresnel from Needs
When building the rim light, instead of immediately applying physical formulas, I reconstructed the logic of the Fresnel effect through a progression of visual requirements:
- Edge Detection: First, I needed to distinguish between the model’s center and its edges. By calculating the Dot Product of the Surface Normal and View Direction (N⋅V), I obtained the facing ratio (White at the center, Black at the edges).
- Inversion: Since the goal is to illuminate the edges, I applied a One Minus (1−(N⋅V)) operation to the result, successfully isolating the model’s silhouette.
- Hardness Control: A simple linear gradient felt too soft. To achieve the texture of a “holographic shield,” I introduced a Power (Exponent) operation. By adjusting the exponent, I compressed the edge width, transforming soft diffuse light into a sharp “light shell.”
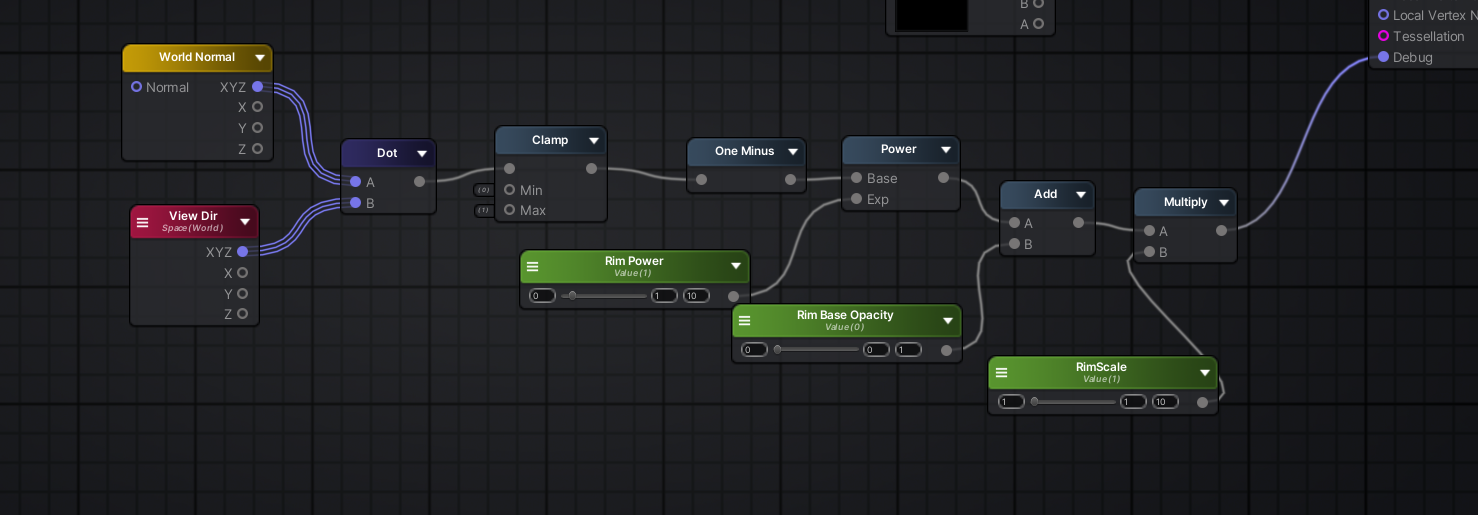
Shader Graph implementation of the logic above.
- Conclusion: This sequence of operations (Edge Detection -> Inversion -> Exponent Control) mathematically reconstructs the standard Fresnel formula: (1−N⋅V)Power. This manual derivation validates the underlying logic of using Fresnel nodes for edge lighting.
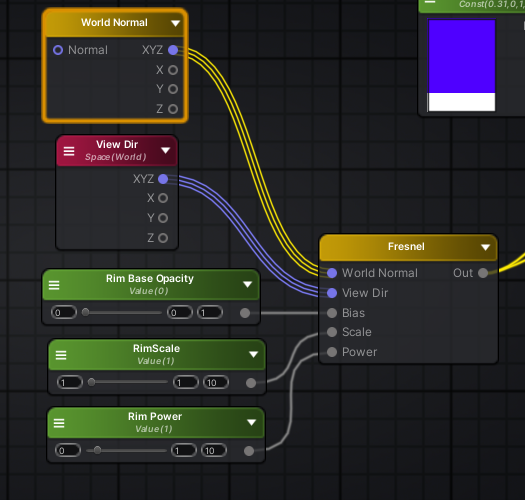
The Standard Fresnel Node.
B. The Quest for Relative Coordinates
To solve spatial issues with texture projection:
-
The Problem: Using Model UVs causes the scan line to warp with the geometry; using absolute World Space coordinates ensures a straight vertical projection but causes a “curtain effect”—where the character moves through the texture rather than the texture following the character.
-
The Solution: Constructing a Relative World Coordinate system.
RelativePos=VertexWorldPos−ObjectPivotPos
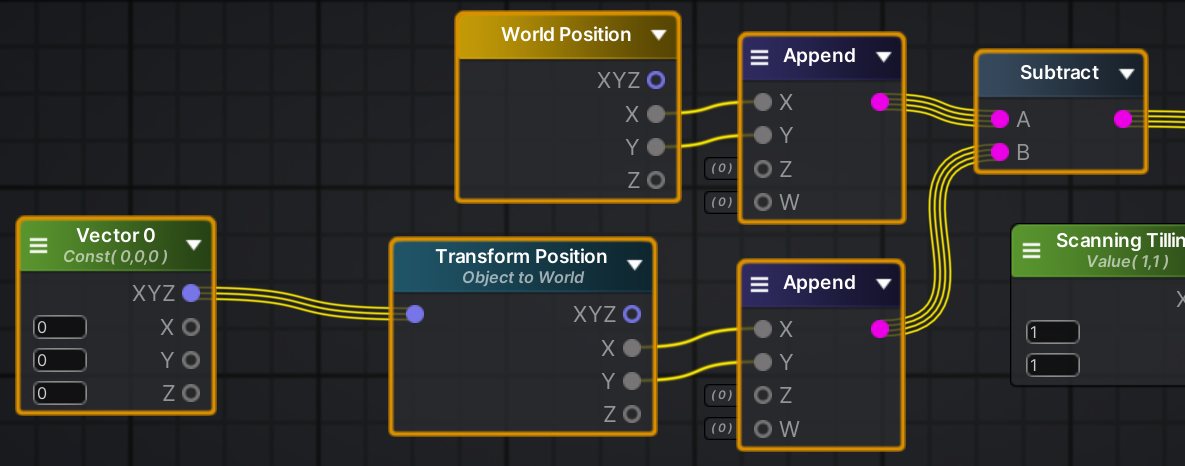
Node Logic: Subtracting the Object Pivot from World Position to calculate Relative Coordinates.
-
The Result: This yields a coordinate system that is both aligned with world axes (ensuring vertical projection) and locked to the object’s position, ensuring the scan line moves synchronously with the character without deformation.
C. Rendering State Configuration
The core of the holographic aesthetic lies in non-standard configurations of Blend Mode and Depth.
1. Blend Mode: Light Superposition (Particle Additive)
I abandoned standard transparency blending (SrcAlpha, OneMinusSrcAlpha) in favor of Particle Additive (SrcAlpha, One).

Additive Mode (Right) produces a purer glow compared to Standard Blending (Left).
- Physical Logic: Holograms are essentially light. Light follows additive color mixing—the more layers you stack, the brighter it becomes.
- Visual Advantage: This “additive-only” calculation ensures the hologram retains a translucent, high-energy look, rather than the darkened, solid appearance of “tinted glass” caused by standard blending.
To resolve the visual clutter where internal structures (like the spine seen through the chest) are visible in semi-transparent rendering, I enabled an Extra Depth Pass.
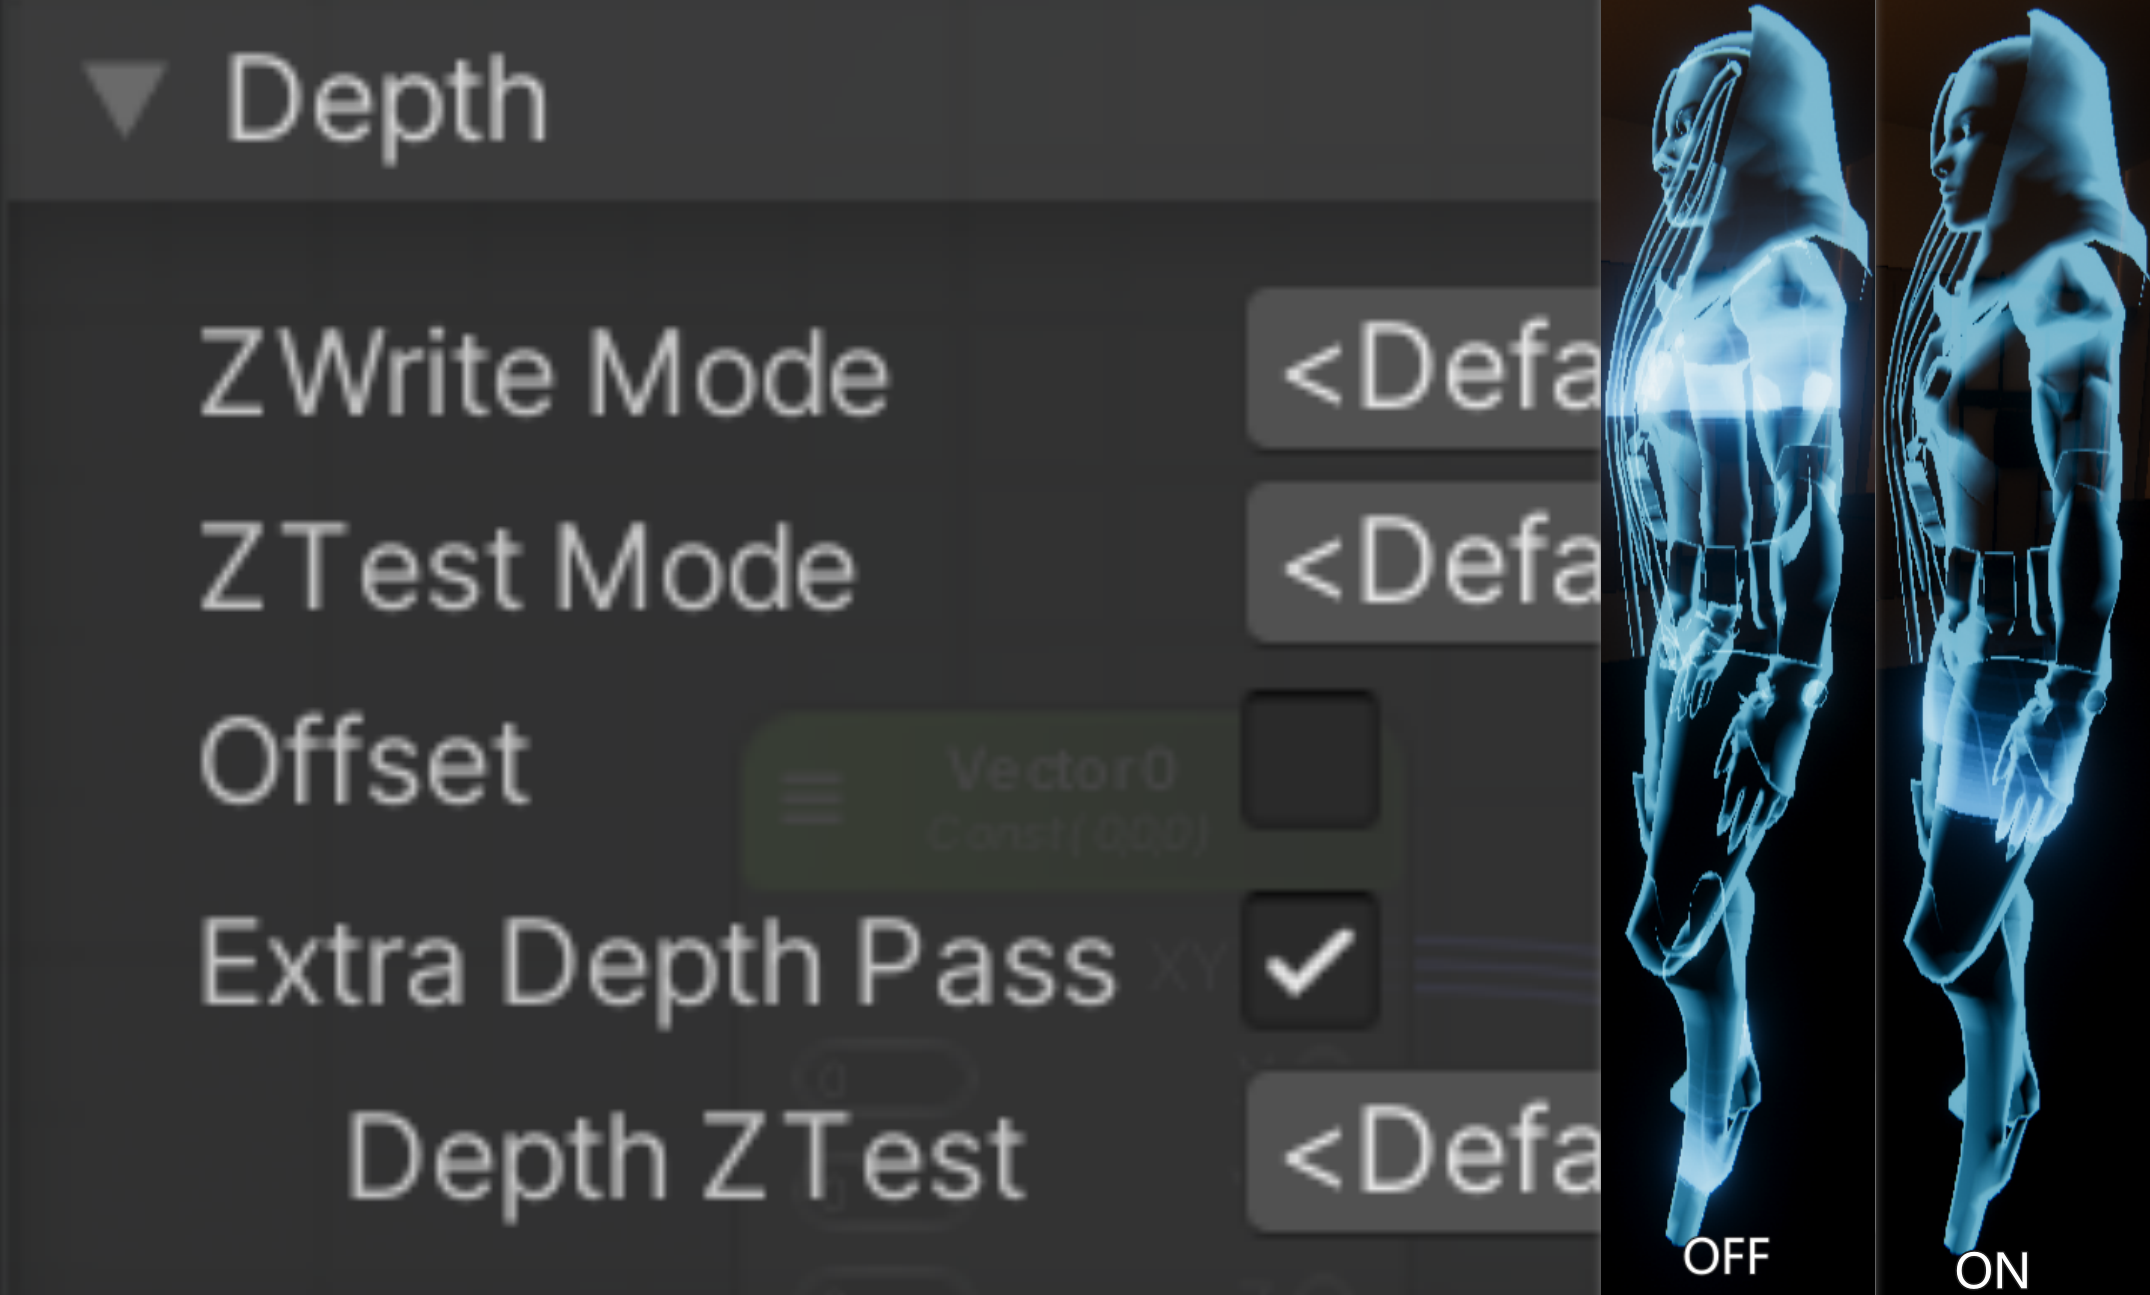
With Z-Write On, internal messy structures are culled, leaving only the outer shell.
- Technical Principle (Double Pass):
- Pass 1 (Mask): Writes to Depth buffer only, with no color output. This creates a “depth mask,” effectively culling all occluded internal faces.
- Pass 2 (Fill): Renders color based on this depth mask.
- The Result: This forces self-occlusion culling on the model. Visually, it retains only the outermost “light shell” while hiding the chaotic internal mesh, significantly enhancing the clean, high-tech feel of the hologram.

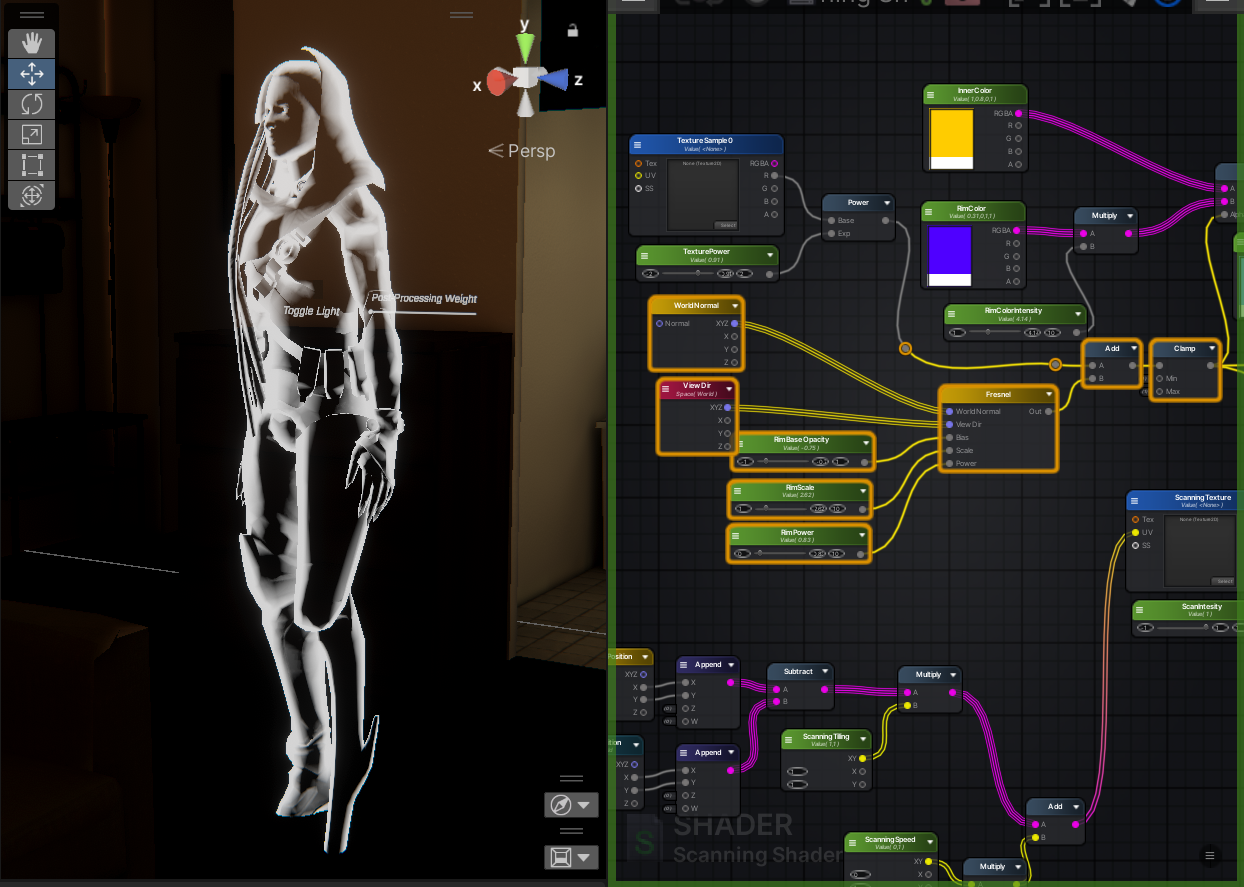
Overview of the complete Amplify Shader Editor graph.
Final Result: Relative coordinates ensure stable scanning, while Depth Write and Additive Blending ensure visual purity.